


A Beginner’s Guide to Playing Table Tennis
Interested in playing table tennis but not sure where to start? Worry no more because in this article we will discuss the basic things that you need to know to help you get started!
First things first, before we proceed with the basic strokes and any table training drills, it is important to acknowledge and learn the correct grip and ready position first.
Grip
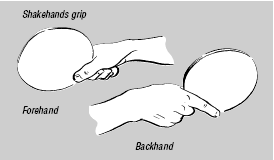
Source: Basic Table Tennis
Establishing the correct way of wielding your racket is important because as you progress and master each stroke and movement, the amount of power that you apply as you hit the ball will also depend on how firm you hold the racket. You might not realize this at first, but your grip is also a factor in optimizing your power.
So here are the points that you have to take note of if you are assuming the shakehand grip.The most popular kinds of grip are the shakehand grip and the penhold grip and of these two, the shakehand grip is the most commonly used. Although there are no official rules as to the proper way of holding the racket, it would help to know the most conventional way of doing it.
- Your thumb should be on the forehand side on the area between the rubber and the handle.
- Your index finger should be on the backhand side landing on the bottom part of the rubber.
- The remaining three fingers should wrap around the handle.
- The webbing between your thumb and index finger should be as close to the edge of racket as possible.
- The grip should be firm but slightly loose. Never hold the racket too tight because it will restrain the muscles in your entire arm and this could affect your play.
Making the mistake of being accustomed to the improper way of holding the racket could give a player a hard time in the long run. That is why as soon as you decide that you want to play, know how to hold the racket correctly, follow the points mentioned above and make some adjustments to find the grip that you are most comfortable with.
If you want to know more about the different kinds of grips and how each affect your play, click here.
Starting Position
The ready position is the starting point of every essential stroke and movement in table tennis. Once the correct ready position is established, it becomes easier for the player to find balance, make quick movements and execute strokes more efficiently.Another thing to consider as you start with table tennis are the starting position and the stance. Generally, these two terms are interchangeable – they could both pertain to the ready position that one has to assume before the rally and as much as possible, before every stroke. However, they are actually different from each other. Strictly speaking, the term ‘starting position’ pertains to where you are standing at your end of the table while the term ‘stance’ pertains to how you stand while you are in the starting position.
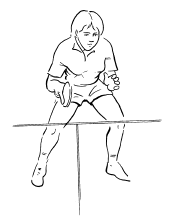
Source: All About Table Tennis
So here are the points that you have to remember when doing the ready position:
- For the starting position, it is ideal to stand on your backhand side of the table. If you are right-handed, you are more to stand on the left hand side of your end of the table and if you are left-handed, you should be more on the right hand side.
- To do the stance, set your feet a bit more than your shoulder width apart. If you are right-handed, your right foot must be a bit behind your left foot. If you are left-handed, your left foot must be a bit behind your right foot. This helps you gain more balance and stabilize your stance.
- Raise your ankle a bit and distribute your weight equally on the balls of your feet. Raising your ankle will help you shift weight easily and bounce from one spot to another allowing you to move quicker around the table.
- Slightly bend your knees and lean your upper body forward. Bending your knees also allows you to make quick movements. If the knees are kept straight and locked, it becomes harder to find balance and switch from one position to another.
- Lastly, bring your arms in front of your body. Your playing hand must be right in front of you and parallel to the ground so you will be able to reach for the ball faster. The non-playing hand on the other hand must also be kept in front of you for the purpose of gaining more balance.
Correct grip and ready position play a big role in building one’s foundation. Acknowledging both helps maximize one’s power and optimize performance. As mentioned earlier, there are no official rules as to the proper way of holding the racket and the same goes for the ready position. But there are conventional ways of doing both and following the points mentioned above could help one achieve it.
So now that we already know about the starting position, we are now ready to learn about the basic strokes. One’s success in table tennis is highly dependent on the correct form of strokes. It is therefore crucial to master the basics first before proceeding to the more complicated ones.
At the beginner’s level, it is important to memorize the four (4) basic strokes first namely the forehand drive, backhand drive, forehand chop and backhand chop since all other strokes generate from these.
Shadow Exercises
For beginners, one way to get accustomed to the proper way of executing the strokes is through shadow practice. Shadow practice involves actual performance of the strokes but without the ball. The stroke is repeated for a number of times in order to be consistent with the movement and to develop muscle memory.
Shadow practice is usually done at the beginning of each training session after the warm up exercises. Aside from the strokes, it is also good for developing one’s footwork but again, for beginners, the focus should be on the mastery of the basic strokes.
Beginners can do 50 to 100 repetitions for each stroke at the start of a training session. But what players have to watch out for really is the quality of each movement and not the number of times they are able to sustain it. No matter how many times one gets to repeat the shot, if the form is not correct, they will only end up developing the wrong foundation.
There are three things that players have to concentrate on when doing the strokes: the backswing, the contact point and the follow-through. Let us go through each stroke so we know how these components work.
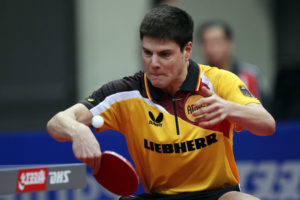
Forehand Drive
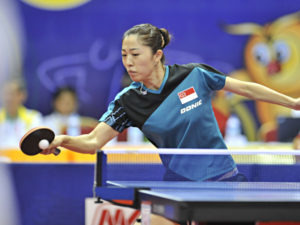
Source: Active SG
Backswing. To be able to do the backswing for the forehand drive, you have to assume the ready position that we have described above. Once you are ready, twist the upper body to the right if you are right-handed (otherwise twist to the left) from the hips. While twisting, shift the weight onto the foot behind and maintain the playing arm parallel to the ground.Forehand drive is the most commonly used stroke among the four. All other forehand strokes like the forehand loop and even the forehand block are drawn from the basic forehand drive. It is therefore important to make sure that the correct forehand foundation is mastered and developed.
Contact Point. After the backswing, you are now ready to move towards the ball. The contact point is where your racket strikes the ball. This is done by twisting the upper body back to the ready position but with your arms moving upwards and by shifting your weight from the foot behind to the foot in front.
Follow-Through. To complete the stroke, you have to do a follow-through. Upon contact of the racket to the ball, complete the shot by moving the arm forward and upward towards where you intend to place the ball. The ending point should always be near your forehead.
For shadow exercises, repeat the stroke for as many as you can and until the movement is memorized. If you are in an actual rally on the other hand, remember to return to your original position right after the stroke so you can prepare for the next shot.
Backhand Drive
Source: Table Tennis Bug
Backswing. We would have to adjust the stance a bit to do the backhand backswing. Instead of bringing your one foot behind and the other in front, it would be better to make a square stance to make the backswing easier and more effective. For right-handed players, the backswing is done by shifting your weight onto the left knee and by bringing the racket near your stomach during the process.Backhand drive is also comprised of the backswing, the contact point and the follow-through. Unlike the forehand stroke, I personally think that backhand drive is the harder but maybe it is just because I spent less time practicing it. So as beginners, try to devote as much time as you would with your forehand to practice your backhand.
Contact Point. To strike the ball, distribute your weight back to both of your knees while moving your playing arm towards the ball.
Follow-Through. Upon contact, continue to more your arm forward and upward towards where you intend to place the ball. When doing the backhand follow-through, focus more on using your elbow rather than your wrist or your shoulder because the power comes from your forearm. Using the wrist and extending the shoulder too much could only lead to lack of power and poor form.
Backhand drive is generally done on your backhand side of the table. Never practice using your backhand drive on the forehand side no matter how good you are at performing it because it will only destroy your form and it will be harder to place the ball at the opponent’s end.
Forehand Chop
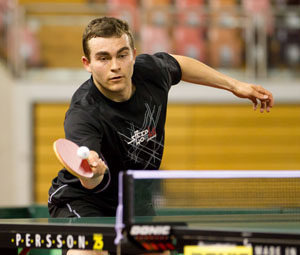
Source: Paddle Palace
Backswing. For the forehand chop backswing, you have to assume the above-described ready position as well but instead of bringing your playing arm in front of you, you have to swing it back and stick it out to the side of your body, still parallel to the ground.Forehand chop is done by chopping the ball underneath and pushing it towards the opponent’s end. It is more of a defensive stroke and is generally used to receive and return an incoming short ball that could not possibly be attacked.
Contact Point. The contact point is done by moving your playing arm from the side of the body towards the ball. Do not stretch out your arm to reach the ball. Instead, move your arm from your elbow and together with your body and remember to keep your racket open at 45 degrees to be able to do the chop.
Follow-Through. To be able to do the follow-through, slice the ball underneath and push it towards where you want to place it on the opponent’s table. The movement should generate from the elbow and the forearm and not from stretching out the entire arm.
Backhand Chop
Just like the forehand chop, backhand chop is primarily done to receive and return an incoming short ball on the backhand side.
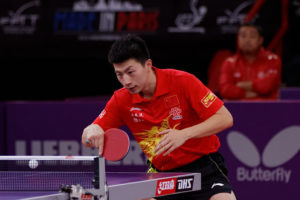
Source: Xinhua
Backswing. For the backswing, assume a square stance just like when doing the backhand drive. Instead of sticking out your playing arm in front of you, perform the backswing by bringing the arm towards chest and with an open angle.
Contact Point. To strike the ball, move the racket towards the ball by bringing it forward and downward from the elbow. Again, avoid stretching out the entire arm. Instead, move your arm together with your body to avoid distortion of the form.
Follow-Through. To complete the stroke, slice the ball underneath by moving the forearm downwards from the chest.
Forehand and backhand chop are generally done to receive a short ball. This means that the body has to move forward to able to reach it. Most of the time players are required to step their playing foot forward and inside the table to be able to complete the stroke without destroying the form.
Conclusion
Good foundation is key to success in table tennis. All other complicated strokes and movements, including even your footwork, will depend on how steady and sharp your basics are. So at the beginner’s level, focus on establishing your grip and ready position and master the four fundamental strokes first. That is all you need to know to get started on table tennis.
Leave a comment